General features
Macros
Operation
In Antigone, you can define up to 16 macros per project. A macro is a project-level modulator: turn one knob, drive any number of parameters across the module — typical performance use cases are filter/timbre morphs, multi-instrument fade-ins, FX wet/dry on the FX bus, etc.
Macros are part of the modulation system and behave like any other modulation source on the MOD ASSIGN screen. Since they are themselves modulators, they cannot be modulated by another internal modulator, but they can be controlled absolutely via MIDI CC (with the expander).
Each macro can be renamed (8 characters max), and 16 macros can share or split CC assignments freely.
flowchart LR
    M["Macro 1"]
    A1(("attnv
58 %"))
    A2(("attnv
18 %"))
    A3(("attnv
-40 %"))
    P1["Filter 1
cutoff"]
    P2["Filter 2
res"]
    P3["Wavetable
position"]

    M --> A1
    M --> A2
    M --> A3
    A1 --> P1
    A2 --> P2
    A3 --> P3

    classDef macro fill:#7c3aed,stroke:#a78bfa,color:#fff,stroke-width:2px
    classDef attnv fill:#eab308,stroke:#facc15,color:#000,stroke-width:2px
    classDef param fill:#06b6d4,stroke:#22d3ee,color:#fff,stroke-width:2px

    class M macro
    class A1,A2,A3 attnv
    class P1,P2,P3 param
Main MACROS screen
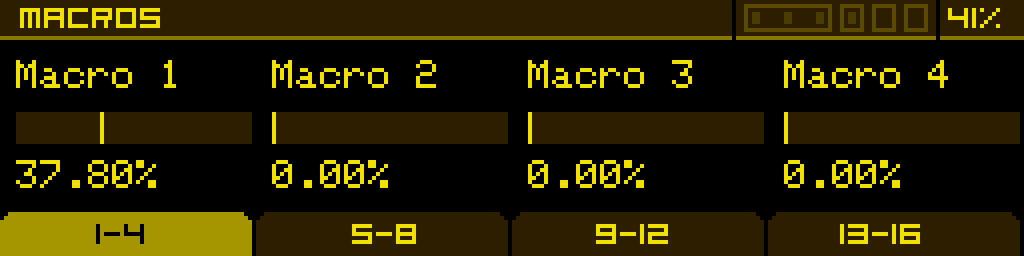
The macros are organised in 4 banks of 4 (macros 1–4, 5–8, 9–12, 13–16). The four footer tabs switch between banks, and the four pots edit the four macros of the active bank. Each macro shows a small indicator (*) in the corner when at least one modulation is active on it.
How to access macros
The MACROS screen is a project-level component reached through the shortcut menu — open it from anywhere with ALT + encoder, or from the PROJECT screen via the MENU > footer button, then pick MACROS.
How to modulate a parameter with a macro
For the full procedure, see Assign modulations. When picking a source on the MOD ASSIGN screen, choose one of the GLOBAL → MACRO 1…MACRO 16 entries (header GLOBAL, source MACRO N).
Editing a macro — the MACRO MATRIX
To inspect every parameter a macro modulates, rename it, fine-tune the depth of each modulation, or delete an existing modulation, long-press the button below the macro on the MACROS screen. This opens the MACRO MATRIX for that macro.
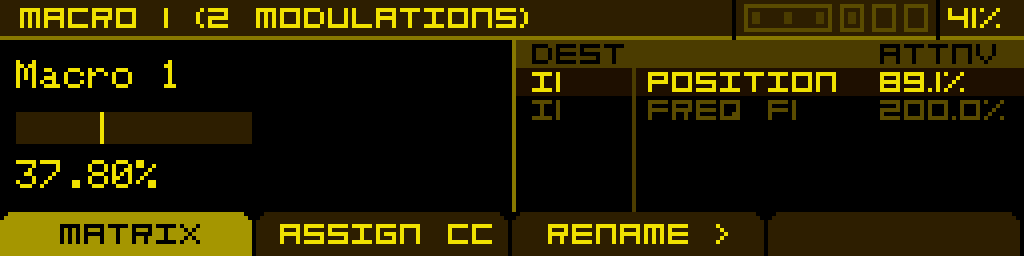
Screen layout
The header reads MACRO n (N MODULATIONS) so you always know which macro you're editing and how many parameters it drives. The screen has two tabs in the footer:
- MATRIX — the list of every parameter this macro modulates, with the macro's current value displayed at the top.
- ASSIGN CC — sets the MIDI CC the macro listens to (see below).
The footer also exposes:
- RENAME > — opens an inline rename dialog (8 characters max).
- (delete) — the rightmost button removes the highlighted modulation. Active only on the MATRIX tab when at least one modulation is present.
MATRIX tab
The top row shows the macro itself: its name (editable via RENAME >) and its current value (0 → 100%). Below it, a row per modulation that this macro drives — each row shows the destination parameter and a small graphic for its attenuverter.
Turn the encoder to scroll between modulations. The currently highlighted row is the one being edited. Pot 4 adjusts the Attnv of that row in real time, from −200% to +200%.
Press the encoder on a row to jump to the destination parameter's MOD ASSIGN screen, with the slot pointing back to this macro pre-selected — so you can edit the modulation in full (smooth, stepped, MIDI CC, source) without losing your place.
Tip: the MACRO MATRIX is the fastest way to dial in a performance macro — open it once, scroll through every parameter the macro touches, and tune each attenuverter without ever opening the destination machine pages. Combined with RENAME, it's the ideal place to finalise a macro before a live set.
Difference with the Modulation matrix
Both screens are read/edit views of the modulation system, but with different axes:
| MACRO MATRIX | MOD MATRIX | |
|---|---|---|
| Scope | One specific macro | Whole project |
| Rows show | Parameters modulated by this macro | Every active modulation, all sources |
| Sort by | Macro (one at a time) | Source / destination |
| Editing | Attnv per row + jump to MOD ASSIGN | Same |
| Source filter | Always this macro | Any source |
Use MOD MATRIX to audit the project as a whole; use MACRO MATRIX when you want to fine-tune a specific macro for performance.
Assigning a MIDI Control Change (expander required)
The ASSIGN CC tab — both on the MACROS screen (per-macro tab) and on the MACRO MATRIX — sets the MIDI CC that drives this macro:
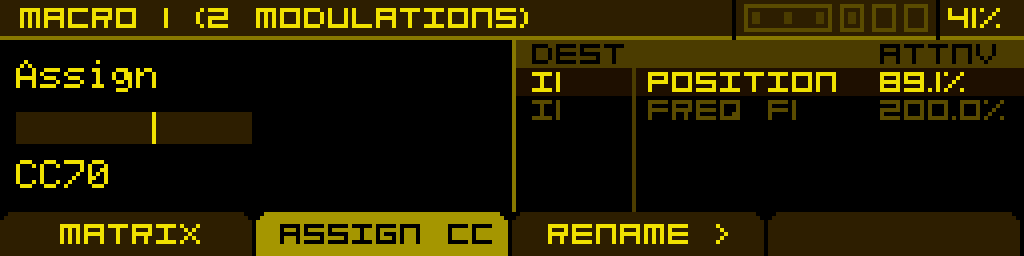
The Midi Assgn parameter:
- Off — no MIDI control of this macro.
- CC 1 to CC 119 — the macro listens to this CC.
By default, macros 1 to 16 are pre-assigned to CC 70 → CC 85 (sequential). Multiple macros can share the same CC.
This tab is hidden on builds without the expander (no MIDI input).
Renaming a macro
The RENAME > button (in the MACRO MATRIX footer) opens the macro-name editor:
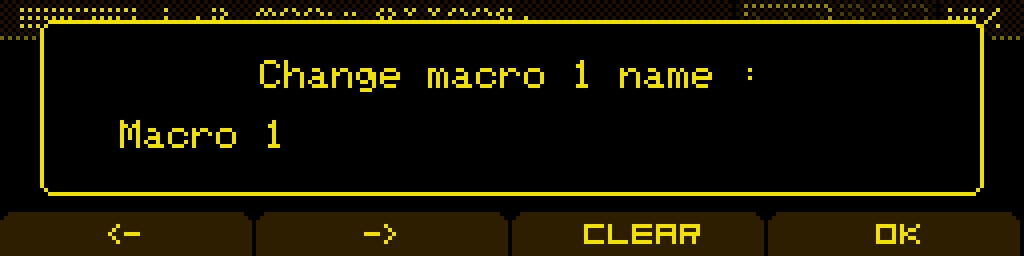
- Buttons 1 / 2 — move the cursor left / right.
- Encoder rotate — change the character at the cursor.
- CLEAR — erase the name and reset the cursor.
- OK — confirm the new name.
- < | ALT — cancel.