Quick start
Introduction
You've just received the Antigone module — thank you. Let's get straight to the point and play your first instrument.
Firmware version: this guide refers to firmware 2.0.0 or later. The version is shown in the top-right of the screen at boot. If yours is older, see How to update the firmware.
The Init project
On first power-up, your module starts on the Init project.
A project bundles one or more instruments and defines how they play: number of voices, voice mode, control source (CV/Gate or MIDI), routing, modulations… Everything you'll edit lives inside a project.
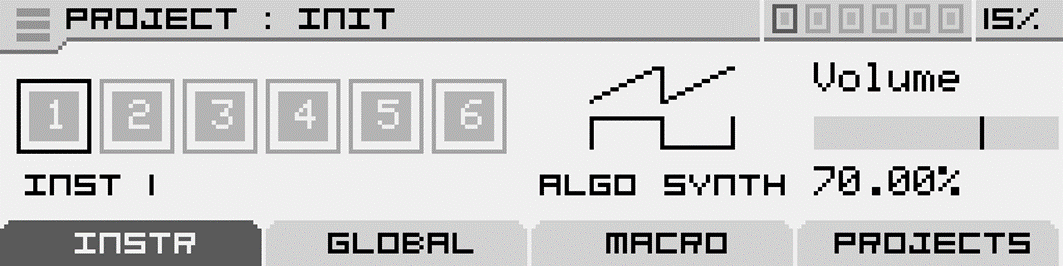
The Init project loads a single instrument (INST 1) on a single voice (Antigone has 6 voices total) routed to outputs 1 and 2. By default the control source is CV/Gate, unless you have the MIDI/CV Expander connected — in which case the default is MIDI.
We'll keep this simple configuration for now and edit it later.
Connect an audio cable
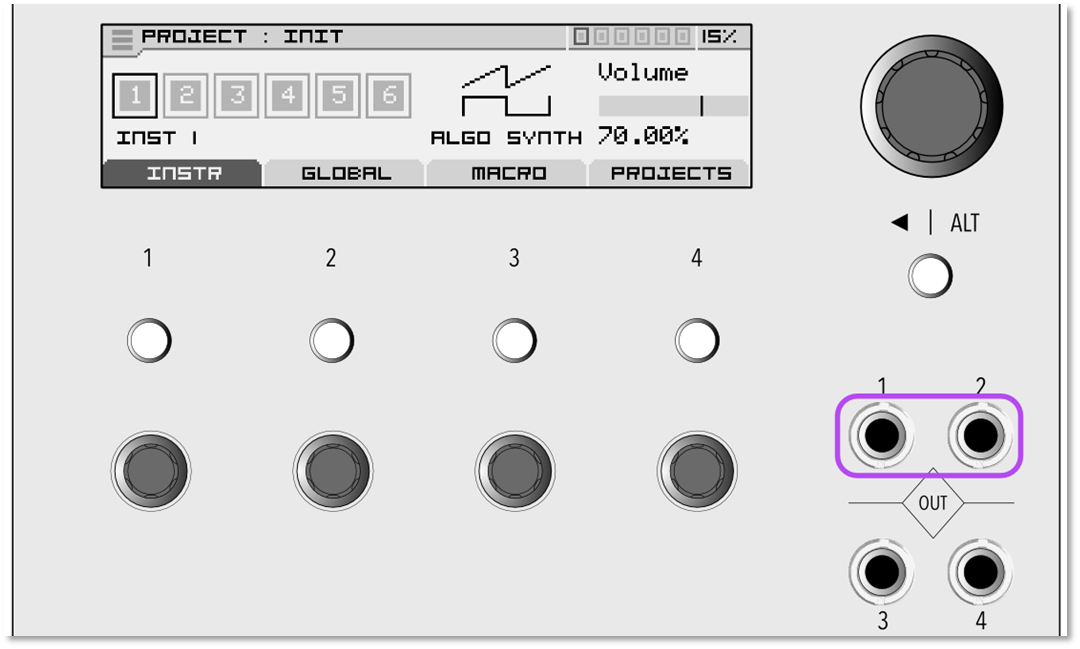
Connect a cable from the Out 1 output of the module to your mixer / amp / audio interface, then a second cable from Out 2.
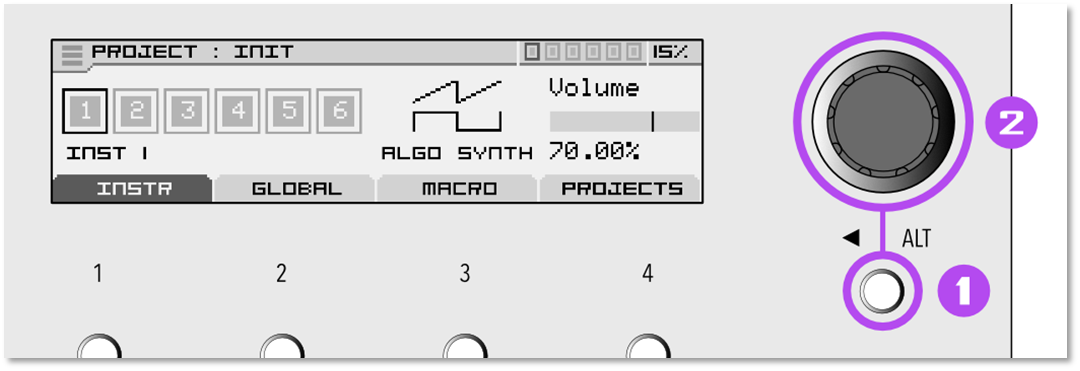
Tip: to play a note immediately, hold ALT and press the encoder — that triggers the C2 note of your project, no keyboard needed.
Connect a keyboard
The control source is set per project — changing it on one project does not affect other projects on the SD card. The choices are CV/Gate or MIDI*.
*MIDI is only available with the MIDI/CV Expander connected.
Important: the control source lives in the CONTROL slot of each instrument. It is not a global setting — every project (and every instrument inside a project) has its own CONTROL configuration.
Open the CONTROL slot
From the PROJECT screen, select instrument 1 and press the encoder to enter the INSTRUMENT screen.
The first slot — CONTROL — is on the left of the instrument's slot list. Press the encoder to open the Instrument Control screen.
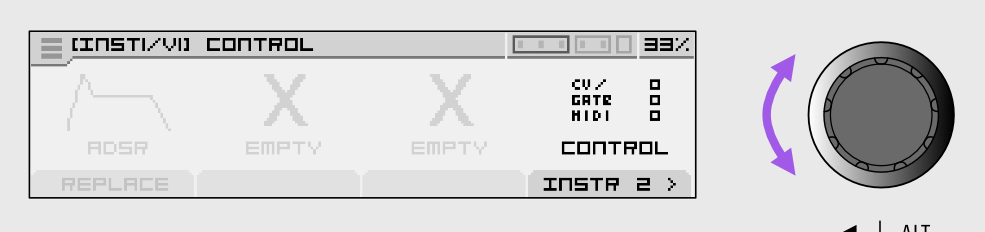
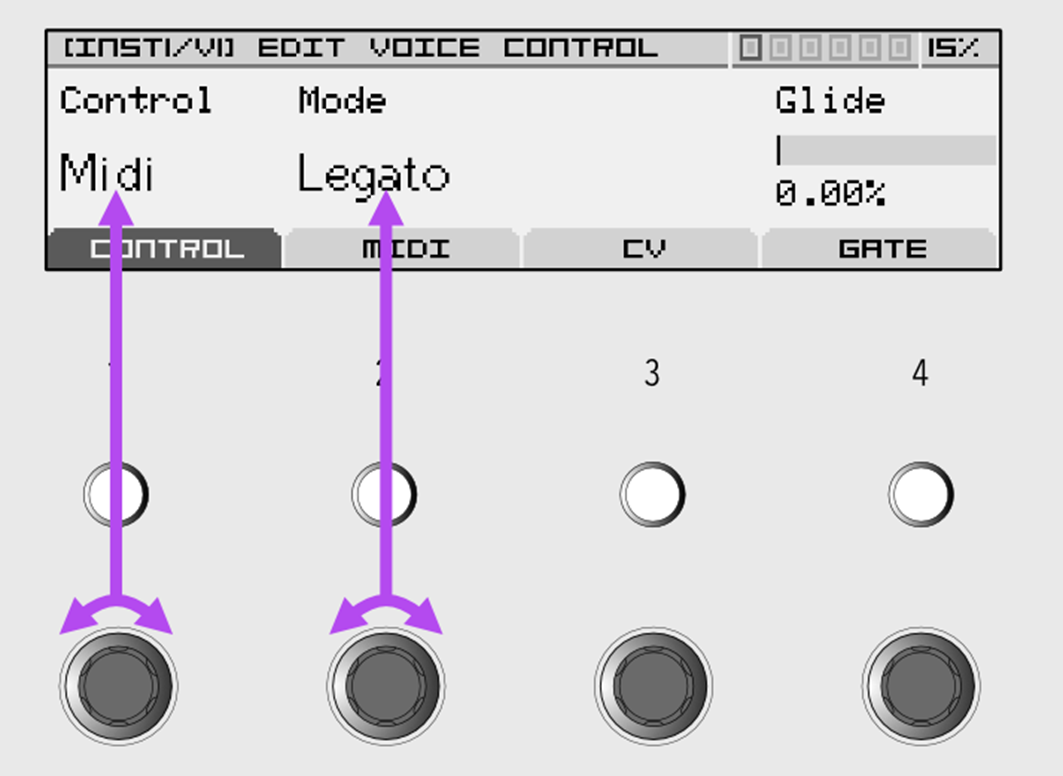
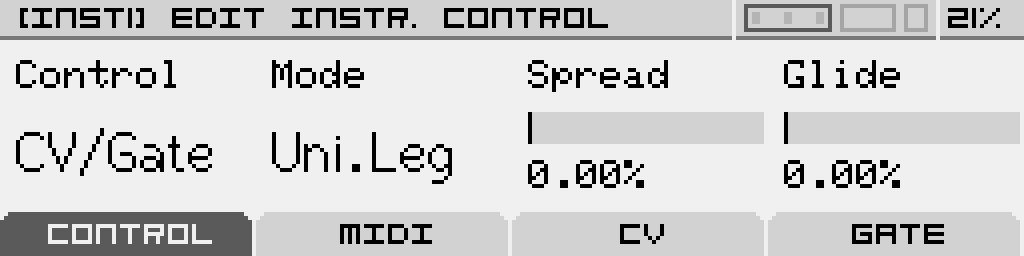
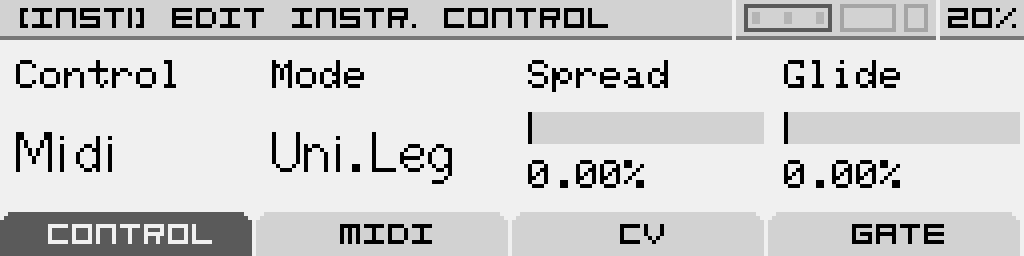
The first knob (Control) selects the source: Off, CV/Gate or MIDI.
Voice mode (Mono, Legato, Unison, Poly), Glide, Drift, Spread and scale quantization are no longer in CONTROL. They live in the Note FX slot of the instrument — the default Note FX is Note, which exposes all of those parameters.
CV/Gate
In CV/Gate mode you can use any compatible keyboard or controller (e.g. Arturia KeyStep).
- Connect a cable from the Gate 1 input of the module to the Gate output of your keyboard.
- Connect a cable from the CV IN A input of the module to the CV / Pitch output of your keyboard.

You should now hear sound on outputs 1 and 2 when you play the keyboard.
For the full reference of CV/Gate routing options, see Voice control / Instrument control.
MIDI
If you choose MIDI, you'll need the MIDI/CV Expander.
| 
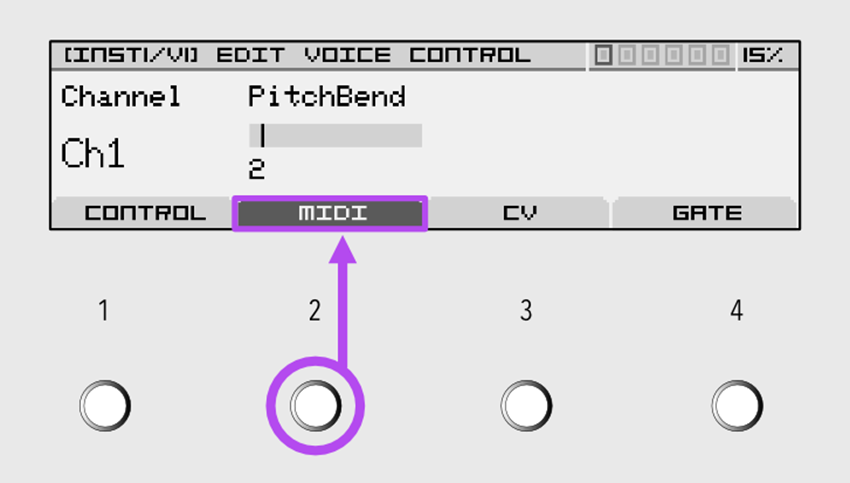
Connect a TRS Type A or B cable from the expander's MIDI input to the MIDI OUT of your keyboard. The MIDI tab — accessible via button 2 on the Instrument Control screen — sets the MIDI channel and the Pitch Bend range.
| !MIDI/CV Expander
MIDI/CV Expander |
By default the instrument listens on MIDI channel 1. Change it with the dedicated knob on the MIDI tab.
Save your project
Press ALT repeatedly to step back to the PROJECT screen.
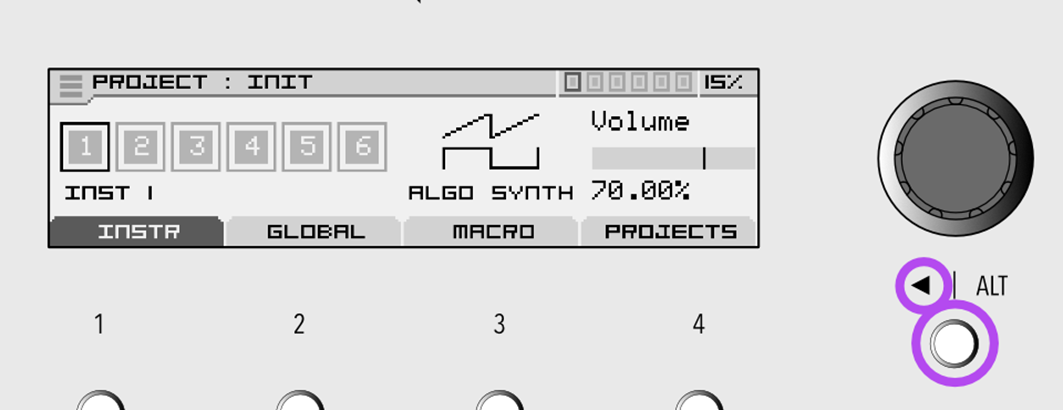
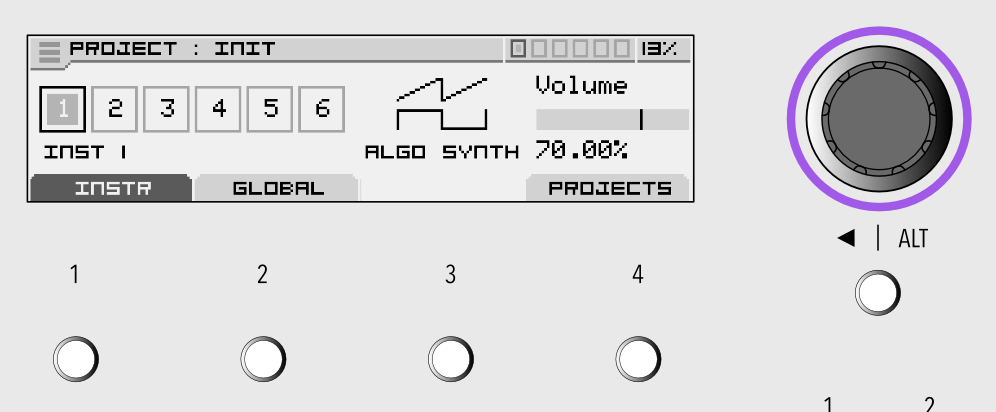
From the PROJECT screen, scroll the encoder fully to the left to highlight the burger menu in the top-left corner.

Press the encoder to open it.
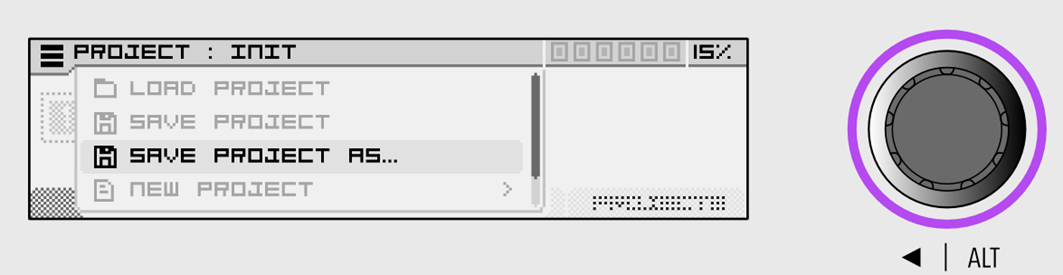
Pick one of:
- Save project — overwrites the current project on the SD card.
- Save project as… — saves the project under a new name.
- Project browser — opens the file browser to load another project.
- New project — starts a new project from a template.
Name your file
When saving as a new file, you'll land on the file-name editor.
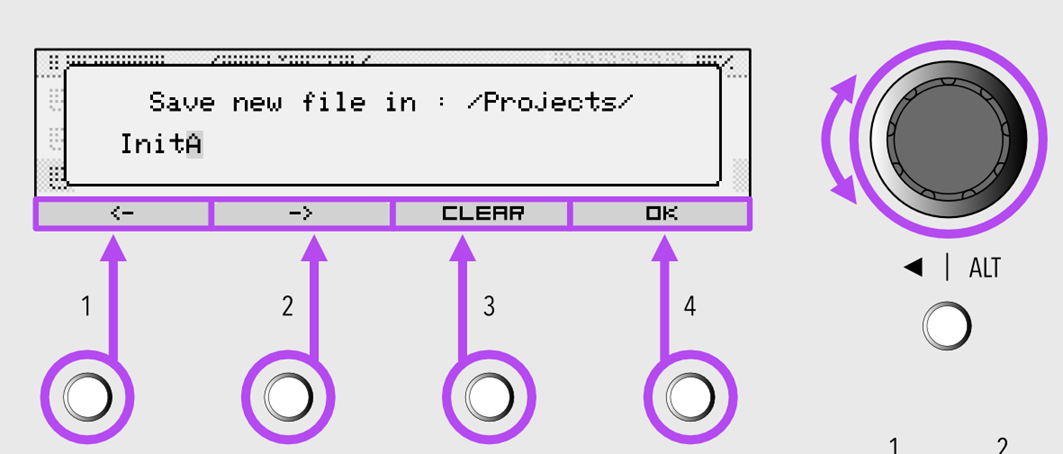
- Buttons 1 and 2 — move the cursor left/right.
- Encoder rotate — change the character at the cursor.
- Encoder press — confirm the character and advance.
- Button 3 — clear the name.
- Button 4 — confirm the save.
- ALT — cancel.
The project is saved as a .nagp file in /Projects/ on the SD card.
That's it for the basics. From here you can:
- Add or replace the synthesis machine inside the instrument — see Synthesis machines.
- Sculpt the sound with the Filter and Amp sections.
- Use the 6 modulators of the instrument — see Modulators.
- Build chord, arp or rhythm patterns with Note FX.
- Add more instruments and reshape the voice layout.